
Configuration design
Search every feasible seven-segment geometry for a span, hub elevation and seabed, and compare the best candidates.
What it does
You give the layout constraints and the system variables. The tool enumerates jumper geometries on a grid of segment lengths, discards those that violate the constraints, predicts unity for every remaining candidate, and groups the results by where the governing stress sits.
1. Enter the system variables
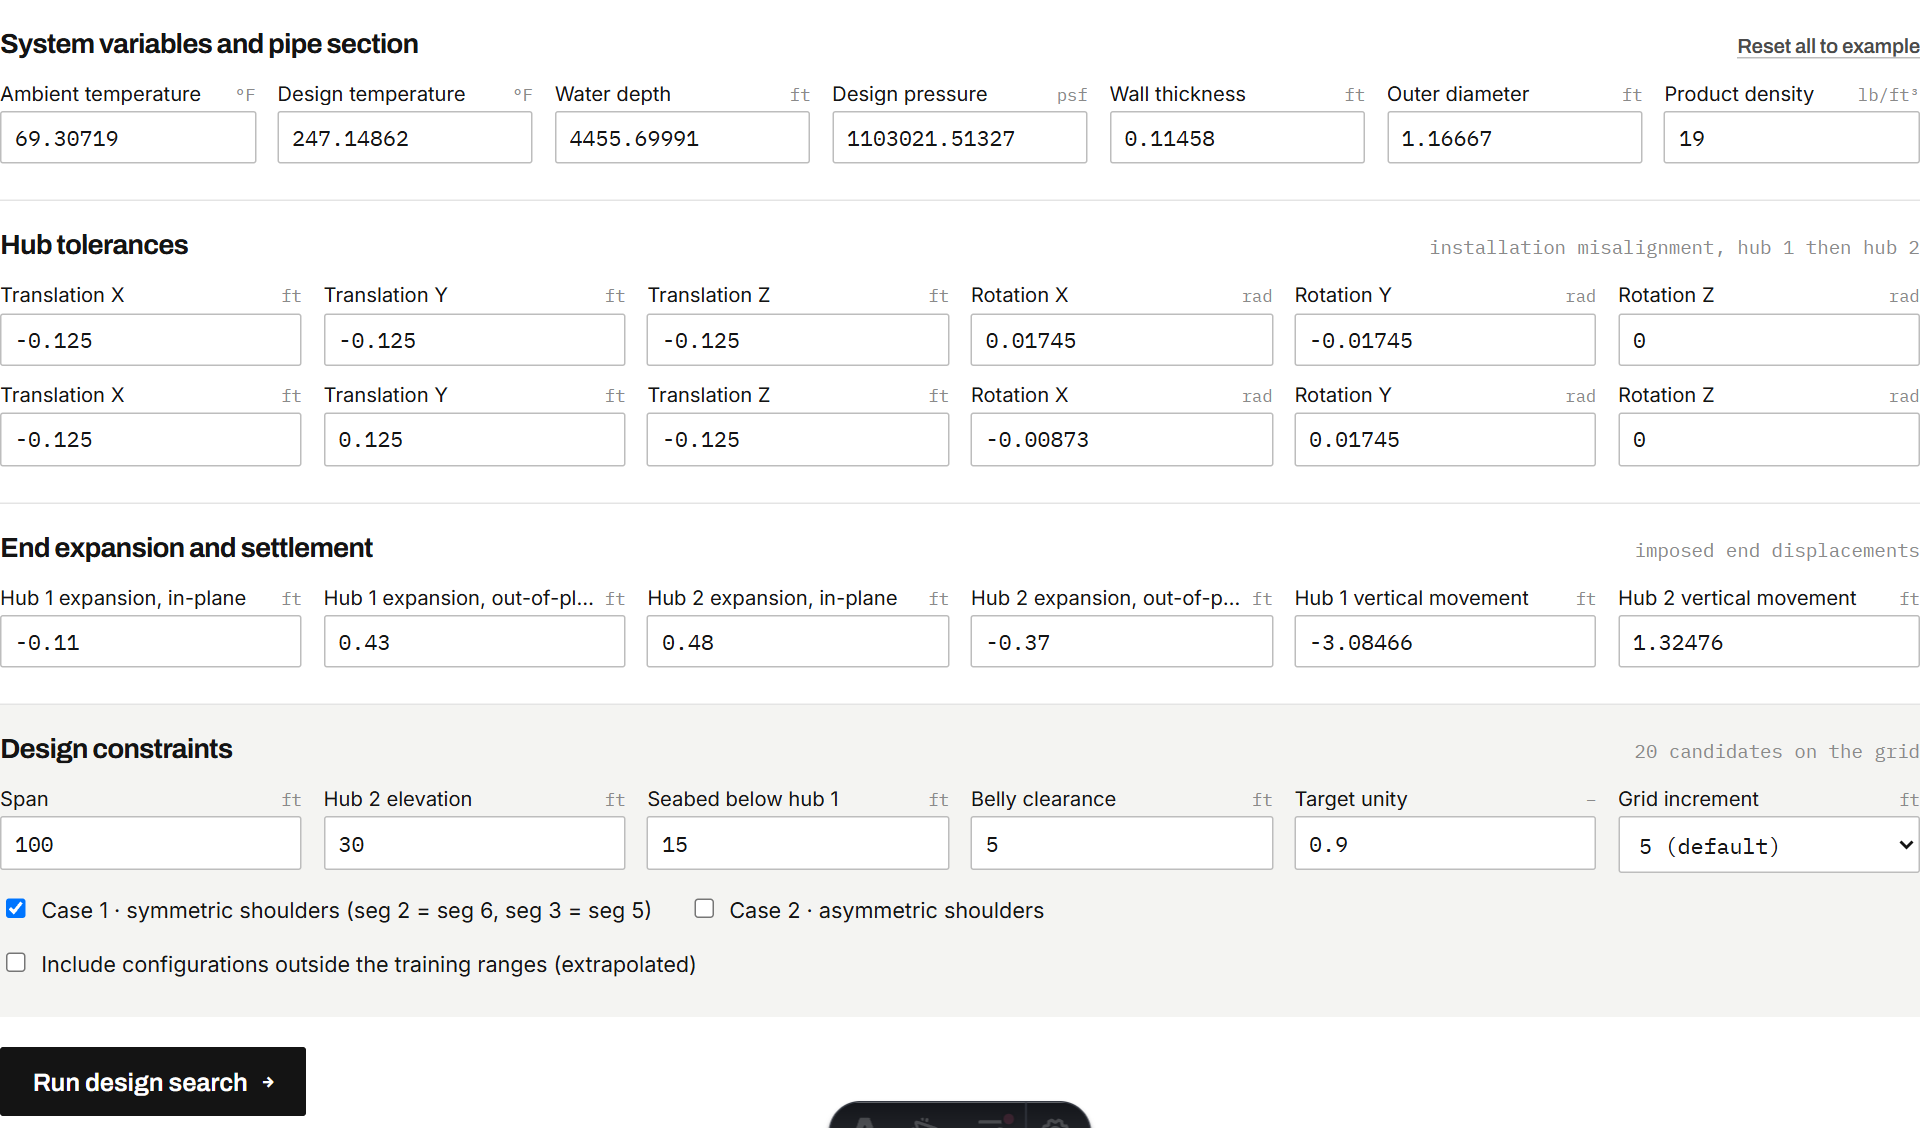
These are inputs 8 to 32 of the strength model: operating conditions, pipe section, hub tolerances and end displacements. The seven segment lengths are what the tool searches, so they are not entered. Reset all to example restores both the variables and the constraints.
2. Set the constraints
| Constraint | Meaning |
|---|---|
| Span | Horizontal distance from hub 1 to hub 2, ft |
| Hub 2 elevation | Height of hub 2 relative to hub 1, ft; positive means hub 2 is higher |
| Seabed below hub 1 | Depth of the seabed under hub 1, ft |
| Belly clearance | Minimum gap between the belly and the seabed, ft |
| Target unity | Candidates are ranked by how close their governing unity is to this |
| Grid increment | Step for the leg and vertical lengths; smaller means more candidates |
Two shoulder families are available:
- Case 1, symmetric shoulders: segment 2 equals segment 6 and segment 3 equals segment 5.
- Case 2, asymmetric shoulders: all lengths vary independently within the closure condition.
The candidate count next to the constraints updates as you type. Above 4,000 candidates the search is refused; increase the increment or drop a case. Both cases apply the belly clearance.
3. Run the search
Press Run design search. The search runs as a background job on the server. A progress bar shows how many candidates have been predicted, and Cancel stops it. A few hundred candidates take under a minute.
4. Read the results
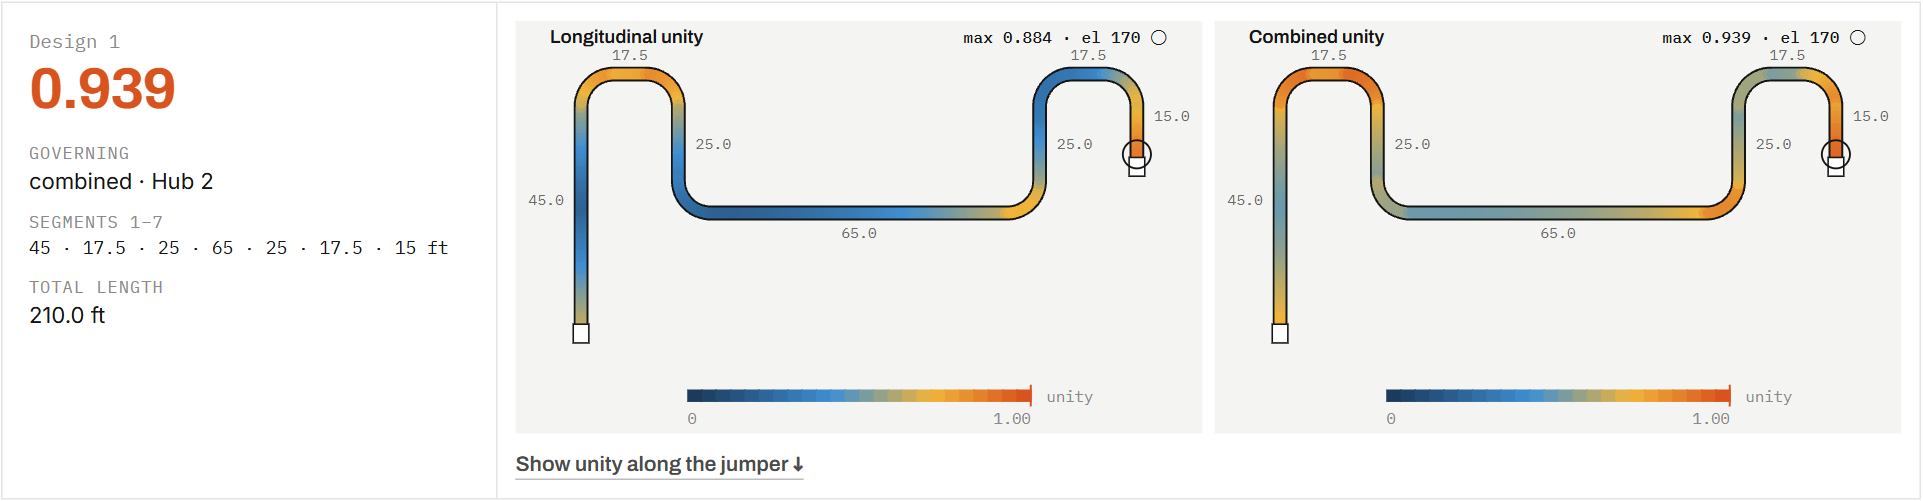
Results start with a summary: candidates evaluated, the lowest governing unity found, the target, and how many candidates meet it. Then:
- Lowest unity: the three candidates with the lowest governing unity, wherever it occurs.
- Governed at hub 1, left shoulder, belly, right shoulder, hub 2: for each location where at least one candidate governs, the three closest to the target.
Each card shows the governing unity, which check and location govern, the seven segment lengths and the total length. Segment lengths are also written next to each segment on the drawings.
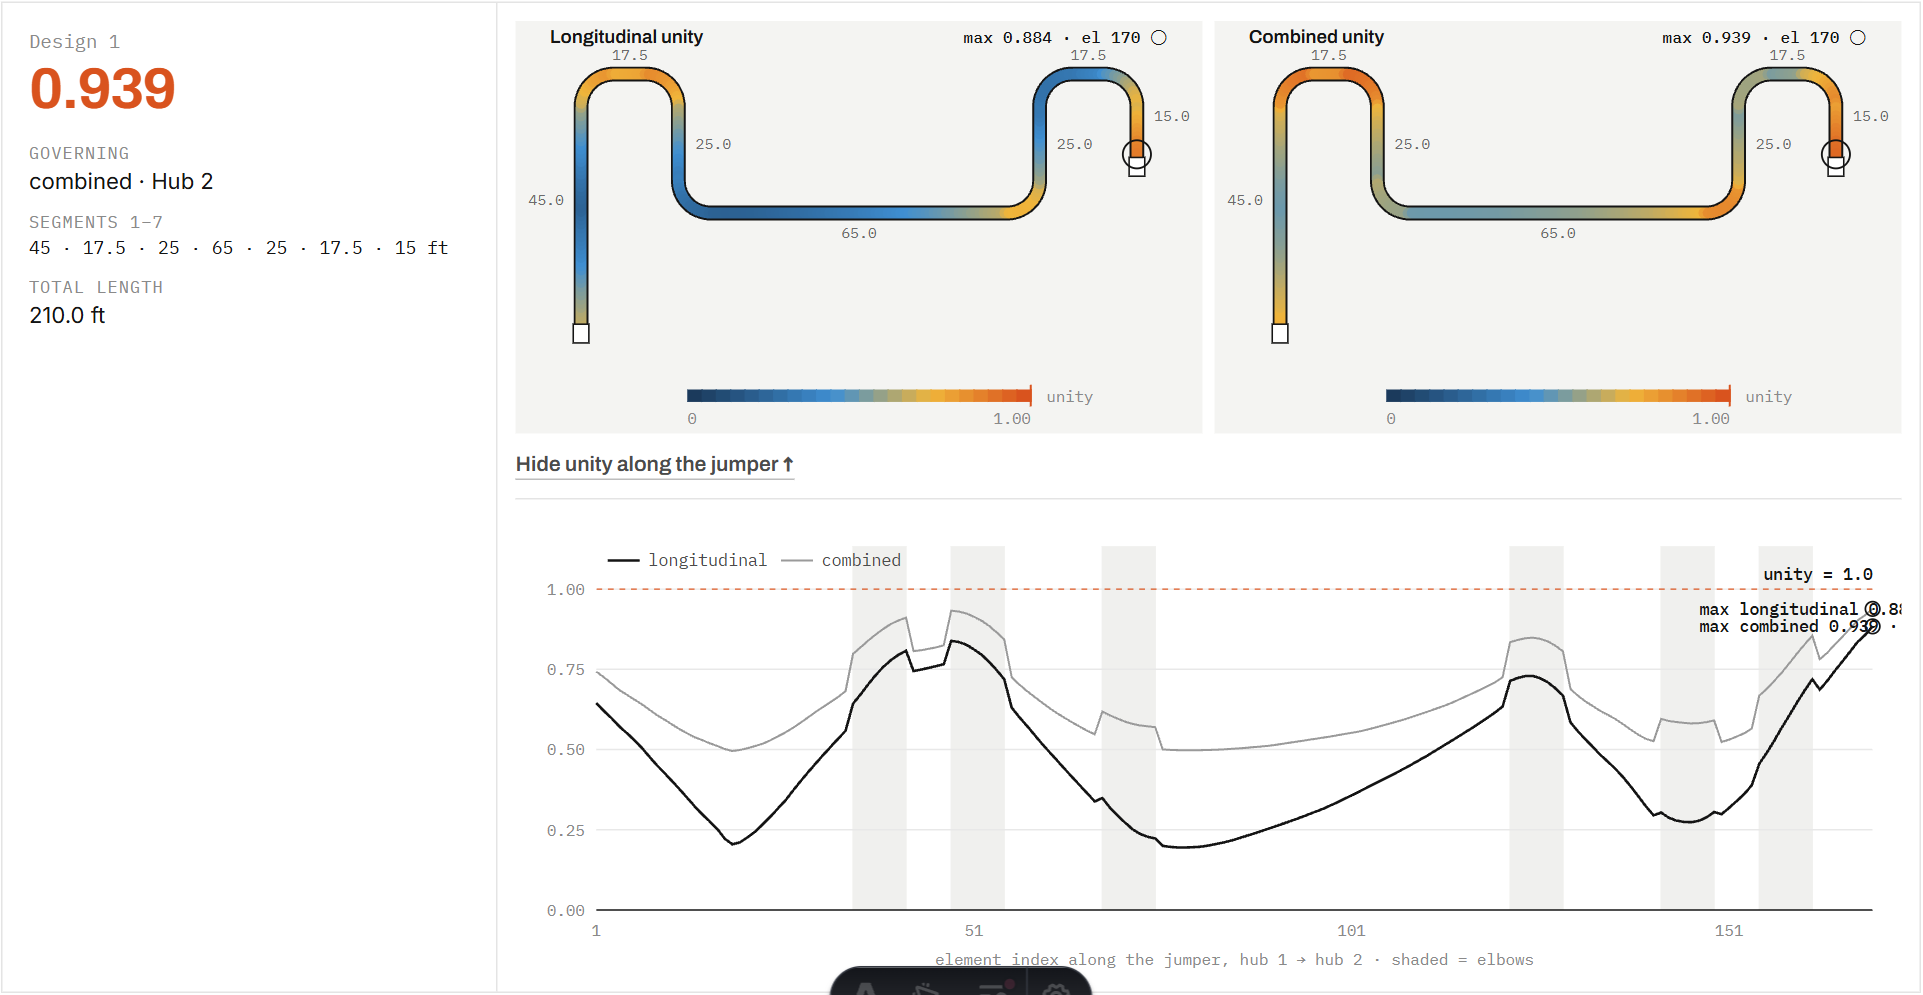
Download all candidates (CSV) exports every candidate, sorted by governing unity, with its segments, length, both maximum unities and the governing location.
By default the search only generates segment lengths inside the strength model's training ranges, so every candidate is one the model can interpolate. That bounds the design space to spans of about 72 to 171 ft and hub 2 elevations of about −20 to +35 ft relative to hub 1.
To search beyond that, tick Include configurations outside the training ranges. Extrapolated candidates are flagged in red on their cards and counted in a warning above the results. Their unity carries more risk than the validation error suggests; verify any you shortlist with a finite-element analysis.
Tips
- If no candidate meets the target, compare the governing locations first. A design governed at the hubs needs more flexibility in the legs; one governed in the belly needs a different span or more clearance.
- Start with the default increment, then rerun with 2.5 ft once you know which region matters.